postcd
Weaksauce
- Joined
- Nov 24, 2016
- Messages
- 96
HP DeskPro 405 G6 DM ( https://support.hp.com/hr-en/document/c06955645 ). In this case 23H62EA with 872E board AM4 socket.
Here are images how to disassemble the computer, it may help someone.
First,
Regarding RAM upgrades, check this thread.
Regarding BIOS update: BIOS (F1 key), BIOS main settings menu, and Update BIOS menu. (internet cable connected to PC), less risky is to use Uninterruptible Power Supply (UPS) during the task.
Regarding (3F0) BootDevice Not Found error check this thread. (it does not support MBR, legacy boot likely, but support likely only GPT, UEFI, else maybe the above 3F0 error)
1. remove all cables and USB drives. Push to power button for a few seconds, to discharge SMDs. Remove screw from the back side
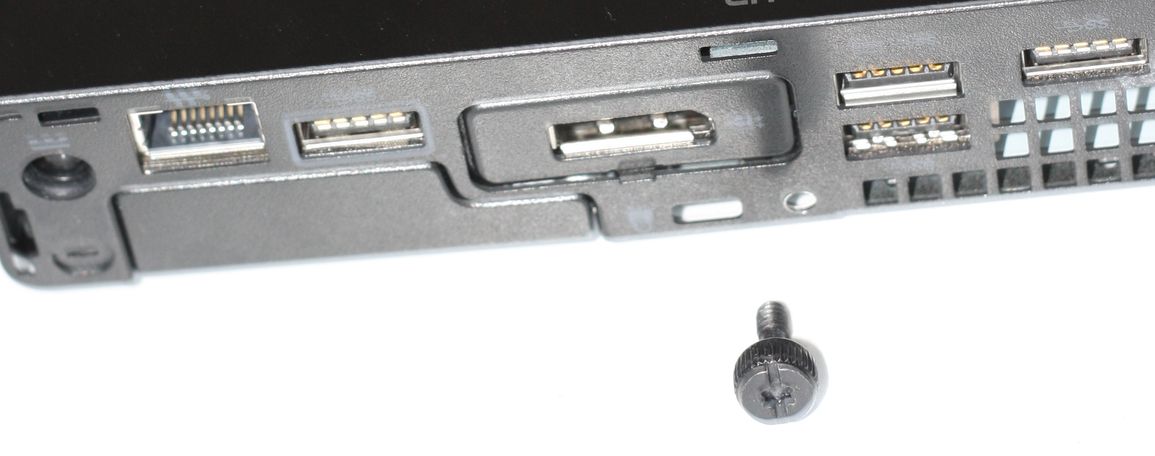
2. in your hands flip the computer up side down having the rear panel away from your body. Use your thumbs to slide the cover (having a sticker on it) away from your body (it will slide like half inch).
3. flip the computer back and put it on the desk to be up side up, removing the upper cover:
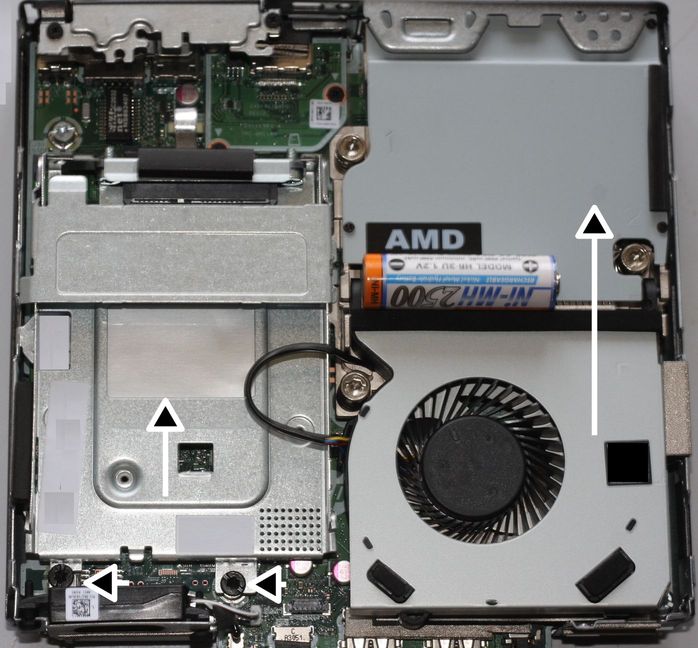
- make sure static electricity does not damage the electronics - do not touch circuits or electronic components, only touch carefully the edges of the circuit boards like RAM, NVMe.. if necessary.
- to add mSATA or remove/replace PCIe NVMe drive, you need to remove metal box for the 2.5" SATA frame seen on the above image on the left. Remove screws and slide it away as arrow shows
- to add/replace SO-DIMM DDR RAM, you need to push up the fan case seen on the above image on the right.
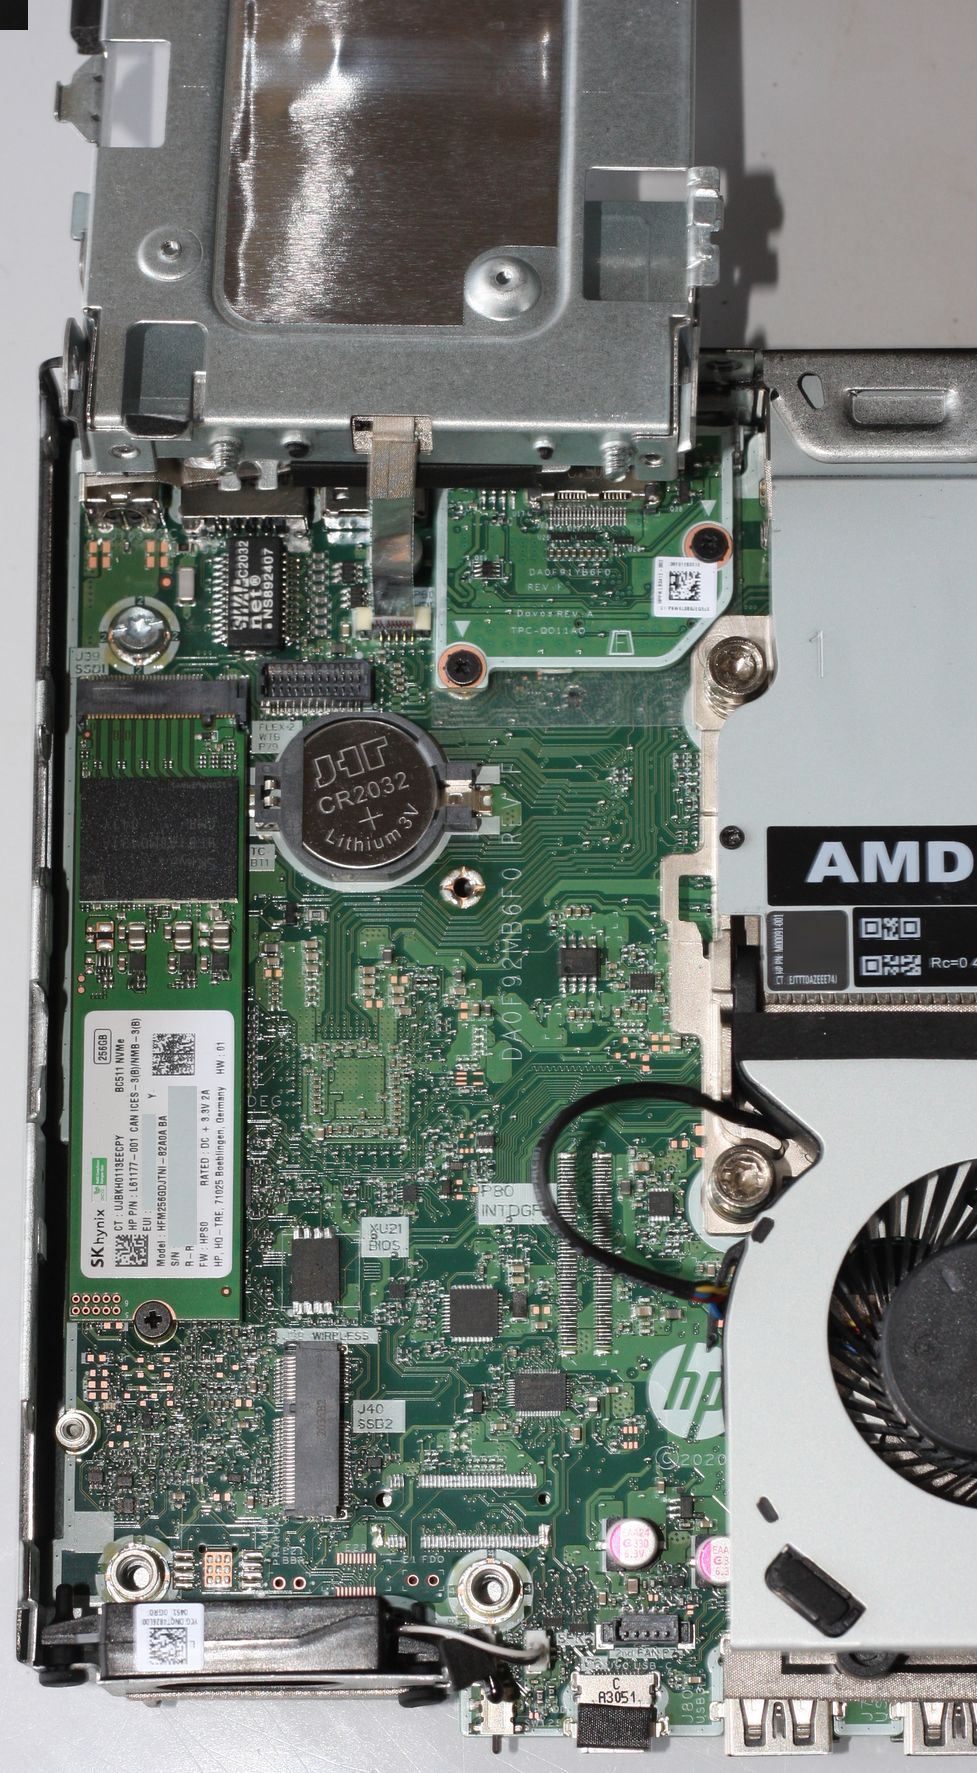
Under 2.5" SATA frame is NVMe card and Msata slot, CMOS battery, 2nd fan empty socket:
On other side, after flipping the FAN case up getting close to the RAM slots (notice the silver covered black foam block on the right of the fan case, when closing you may need to push it to close the case properly):
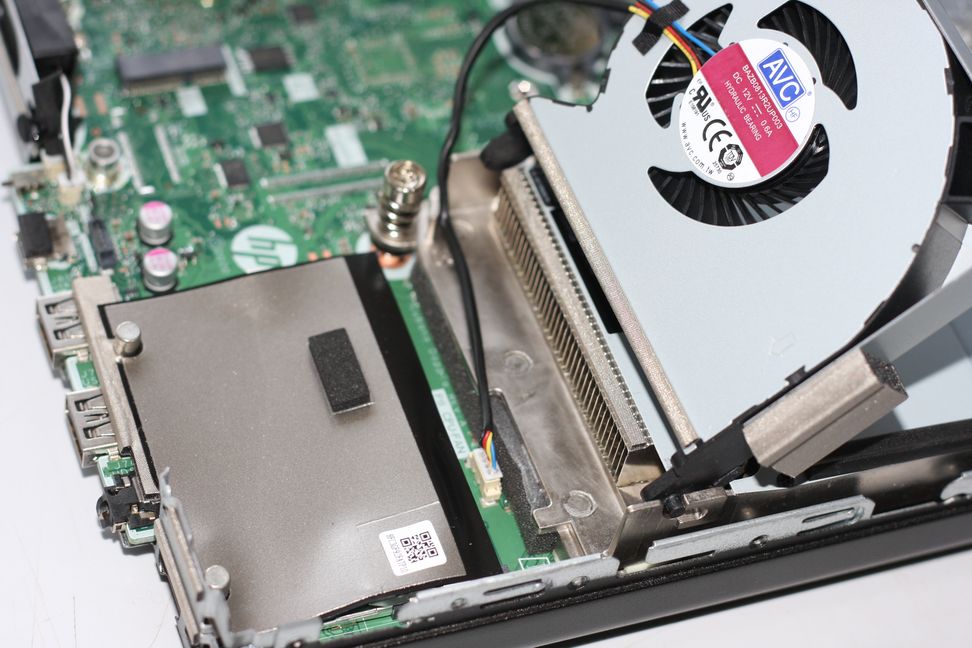
RAM slots can be uncovered by flipping that conductive silver/black tape:
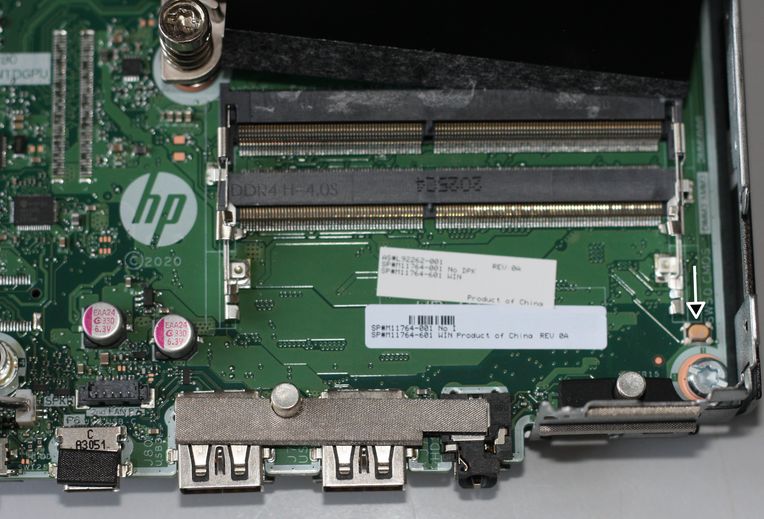
bottom slot is DIMM 1 (occupied by default RAM) and upper is DIMM 0. Computer accepted mixed SO-DIMM DDR4 RAM in my case (8GB+32GB). On the right is CMOS reset button. It was suggested to be used by RAM manufacturer after i did BIOS update (from within BIOS - F1) when troubleshooting RAM issue (my Crucial RAM module was bad).
After assembling the computer, and powering on, it may complain storage or RAM changed, it is not problem. F2 key at POST cause HW diagnostic menu to appear, F1 is for BIOS and INFO.
Computer looks like to be UEFI and GPT only supporting, no legacy MBR mode! So install OS using these new standards or adjust existing OS to meet it. Also if using Linux, maybe one have to disable "Secure boot" option and use Linux distribution known to have latest software, kernel (like maybe Manjaro and Arch, Debian?) i have found in older Linux, the network adaptor Realtek r8169 was not being recognized (networking not working) so on older Linux kernel, one may need to use USB ethernet with older realek chip or updating kernel/Linux.
Here are images how to disassemble the computer, it may help someone.
First,
Regarding RAM upgrades, check this thread.
Regarding BIOS update: BIOS (F1 key), BIOS main settings menu, and Update BIOS menu. (internet cable connected to PC), less risky is to use Uninterruptible Power Supply (UPS) during the task.
Regarding (3F0) BootDevice Not Found error check this thread. (it does not support MBR, legacy boot likely, but support likely only GPT, UEFI, else maybe the above 3F0 error)
1. remove all cables and USB drives. Push to power button for a few seconds, to discharge SMDs. Remove screw from the back side

2. in your hands flip the computer up side down having the rear panel away from your body. Use your thumbs to slide the cover (having a sticker on it) away from your body (it will slide like half inch).
3. flip the computer back and put it on the desk to be up side up, removing the upper cover:

- make sure static electricity does not damage the electronics - do not touch circuits or electronic components, only touch carefully the edges of the circuit boards like RAM, NVMe.. if necessary.
- to add mSATA or remove/replace PCIe NVMe drive, you need to remove metal box for the 2.5" SATA frame seen on the above image on the left. Remove screws and slide it away as arrow shows
- to add/replace SO-DIMM DDR RAM, you need to push up the fan case seen on the above image on the right.
Under 2.5" SATA frame is NVMe card and Msata slot, CMOS battery, 2nd fan empty socket:

On other side, after flipping the FAN case up getting close to the RAM slots (notice the silver covered black foam block on the right of the fan case, when closing you may need to push it to close the case properly):

RAM slots can be uncovered by flipping that conductive silver/black tape:

bottom slot is DIMM 1 (occupied by default RAM) and upper is DIMM 0. Computer accepted mixed SO-DIMM DDR4 RAM in my case (8GB+32GB). On the right is CMOS reset button. It was suggested to be used by RAM manufacturer after i did BIOS update (from within BIOS - F1) when troubleshooting RAM issue (my Crucial RAM module was bad).
After assembling the computer, and powering on, it may complain storage or RAM changed, it is not problem. F2 key at POST cause HW diagnostic menu to appear, F1 is for BIOS and INFO.
Computer looks like to be UEFI and GPT only supporting, no legacy MBR mode! So install OS using these new standards or adjust existing OS to meet it. Also if using Linux, maybe one have to disable "Secure boot" option and use Linux distribution known to have latest software, kernel (like maybe Manjaro and Arch, Debian?) i have found in older Linux, the network adaptor Realtek r8169 was not being recognized (networking not working) so on older Linux kernel, one may need to use USB ethernet with older realek chip or updating kernel/Linux.
Last edited:
![[H]ard|Forum](/styles/hardforum/xenforo/logo_dark.png)