Randy6309
Weaksauce
- Joined
- Jul 3, 2022
- Messages
- 125
Follow along with the video below to see how to install our site as a web app on your home screen.
Note: This feature may not be available in some browsers.
This is the ghetto thread, not the cool thread!

I definitely missed that! Thanks!It's the lego's
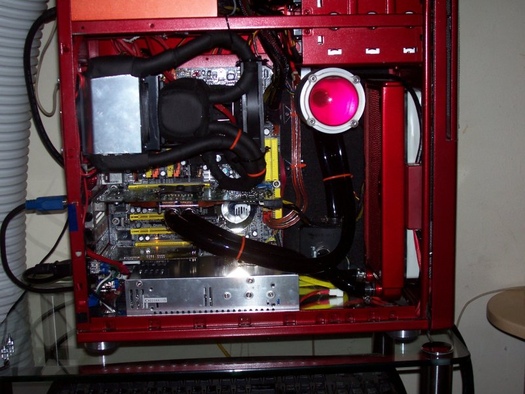
Awesome, is that a s939 setup with a dfi lanparty?Took a coolit freezezone cut the controller out of it and connected it to a meanwell variable power supply replaced the 80mm fan with 92mm and insulated it then cranked the voltage up on the peltier.


Yes it is dual core OpteronAwesome, is that a s939 setup with a dfi lanparty?
Love me a 290x. I have a watercooled one in my main desktop. Albeit slightly thinner then that thing.I've been running a big card for 9 years, it's technically a 4-slot. I also beat Asus to using noctua fans all those years ago!
Guess I'd need a peltier to get similar power draw to a 4090... its an r9 290x, served me well over the years.
Dimensions are ~275mm x 180mm x 80mm l w h.
Rtx 4090 founders dimensions: 336mm x 140mm x 61mm.
View attachment 519116
View attachment 519117
View attachment 519118
Pics attached. Not even slightly ghetto....Love me a 290x. I have a watercooled one in my main desktop. Albeit slightly thinner then that thing.

Ok, that breadboard is ghetto and functional. 5 food stampsPics attached. Not even slightly ghetto....
View attachment 519553


The w7000 is one of my favorite plug and play cards. I used them heavily for mining early in eth and it was amazing how much you could overclock and undervolt those cards. Driver support was amazing and proformance was great for a 100w 1 slot cardView attachment 526477
I took the GTX 1060 I was using out of the relic in my signature because it was more card then I need for the games I play, and installed another ancient relic, a FirePro W7000 (I love BIOS overclocking and undervolting GCN1.0 GPUs using VBE7). Since this is a heavy single slot GPU, I realized I needed a GPU brace. After wandering my castle, I found a new dental irrigation syringe. I cut it to the right length and it made a perfect brace for 0 dollars and doesn't look terrible.
Oh yes, this one runs a 100MHz overclock so far on 1volt, down from the stock 1.120. I also tweaked the fan curve to much slower/quieter speeds to reduce noise/dust build up, yet card doesn't get over 68 degrees C under load! I did disassemble card and completely clean it and upgraded to Arctic MX4 paste. When I pulled card apart the heatsink entrance was completely blocked with dust bunnies like what you'd see on a laptop heatsink. I paid a whopping $20 for the card from a local PC shop! Plays Cyberpunk 2077 at my native 1360x768 at 30FPS on low settings, and Far Cry 6 at medium settings 30+FPS so I'm good. Other then these two, all the other games I play are older.The w7000 is one of my favorite plug and play cards. I used them heavily for mining early in eth and it was amazing how much you could overclock and undervolt those cards. Driver support was amazing and proformance was great for a 100w 1 slot card
I used to run it under esxi with GPU passthrough and have seperate gaming vms seperated from the main one. Similar overclock bios flashed so I didnt have to mess with it and it worked flawlessly under passthrough and any OS. Played almost any game just fine. Ran ark at 1080p. Way cooler then the s9000(Tahiti) cards I had.Oh yes, this one runs a 100MHz overclock so far on 1volt, down from the stock 1.120. I also tweaked the fan curve to much slower/quieter speeds to reduce noise/dust build up, yet card doesn't get over 68 degrees C under load! I did disassemble card and completely clean it and upgraded to Arctic MX4 paste. When I pulled card apart the heatsink entrance was completely blocked with dust bunnies like what you'd see on a laptop heatsink. I paid a whopping $20 for the card from a local PC shop! Plays Cyberpunk 2077 at my native 1360x768 at 30FPS on low settings, and Far Cry 6 at medium settings 30+FPS so I'm good. Other then these two, all the other games I play are older.


nice. what blocks are you using on the cpu and gpu?View attachment 557962View attachment 557963
Full loop after upgrade, 3d printed custom blower for vrm an ram cooling on a r9 290 directcu II and a larger jar for the 2 pump.
I added a 360mm radiator because the water would go to like 60 degree without it.

I used 4 euros block from the internet, they are not as efficient as genuine watercooling solution but I never exceed 65 degree on the cpu nor the gpu View attachment Cooling-Water-Aluminum-Block-for-CPU-Radiator-Liquid.webpnice. what blocks are you using on the cpu and gpu?
everyone used aquarium pumps back in the day!Holy f.... aquarium pumps?
Love it! Living on the edge


yeah I hate those OEM specialty designs too! Great job on the e-cycling
Great job! Did you drill and tap the standoffs that you moved, or just cut the threads and glue them down?


Always love a cardboard and tape job. Well done.figured I was obligated to post my latest build here. Its a box, many zip ties were used.
https://hardforum.com/threads/2u-box.2028501/
View attachment 575677View attachment 575679
It connects the green psu wire to ground turning on the computer (both loosly wrapped around the switch terminals).What is the toggle switch for? Look at that clean tape job!
No need for that, when boxes come free, one can splurge on the food and zip ties required for success.In the spirt of the thread... how many food stamps is this worth? Or as this is 2023, a reload on your EBT card